Why Does My Tube Sealing Machine Leak?

Time:2026-09-23 Author:Sophia
0%

If you are asking, “why does my tube sealing machine leak,” the answer may involve more than one setting. A weak seal can appear after a clean production run, which makes the problem frustrating. You may notice product residue around the tube mouth, uneven sealing lines, or small air bubbles inside the seal. These signs often point to heat, pressure, timing, contamination, or tube alignment issues.

In practical maintenance work, technicians usually inspect the sealing jaws first. A scratched jaw can create a narrow leak path. Incorrect temperature may leave plastic soft, brittle, or only partly fused. Excessive pressure can also distort the tube instead of improving the seal. Even a thin film of product on the sealing area can prevent proper bonding. Tube material, wall thickness, and diameter must match the machine settings and manufacturer guidance.

Do not change every setting at once.

That approach can hide the real cause. A better method is to record the current temperature, sealing time, pressure, and cooling period. Then test one variable at a time with clean, unused tubes. Check the seal under steady lighting, and gently inspect it after cooling. A dye or approved leak-test method may reveal defects that visual inspection misses. However, test procedures should follow the equipment manual and workplace quality requirements.

This guide explains common leak sources, safe inspection steps, and practical adjustments. It also considers less obvious problems, including worn heaters, misaligned jaws, unstable air pressure, and inconsistent tube dimensions. Some assumptions may prove wrong. Careful records help turn a confusing leak into a controlled, repeatable diagnosis.
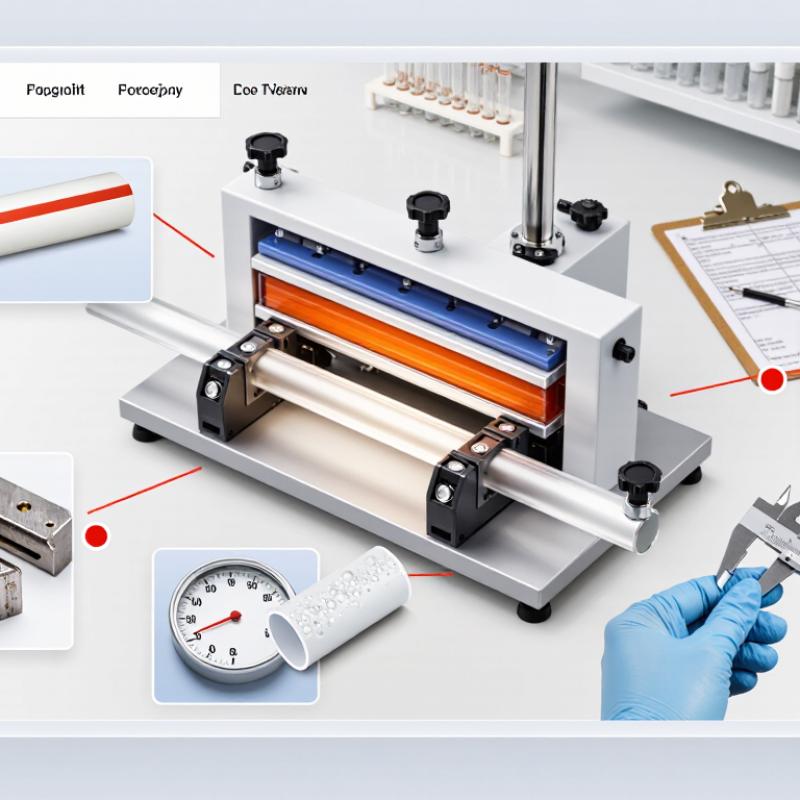
Why Does My Tube Sealing Machine Leak?

How Tube Sealing Machines Create Airtight Seals

Why Does My Tube Sealing Machine Leak?

A tube sealing machine creates an airtight seal through heat, pressure, and controlled cooling. The heated jaws soften the tube’s inner layer. Pressure then fuses both surfaces together. Cooling locks the bond in place.

Small defects can break this seal. Residue on the tube edge acts like a tiny bridge. Excessive speed can shorten the heating cycle. Uneven jaw pressure creates weak corners. In practice, temperature alone is rarely the answer. ASTM F88/F88M provides a recognized method for measuring seal strength. ISO 11607-1 also emphasizes consistent sealing processes and package integrity. Smithers’ 2024 flexible-packaging market analysis identifies seal integrity as a continuing technical priority. That matters because modern films often use thinner, more sensitive structures.

Tips: Clean the sealing area before every production run. Check jaw alignment with a thin test strip. Record temperature, pressure, dwell time, and cooling time. Then test several sealed tubes, not just one. A seal may look perfect but fail after handling. Test it.

Operators should also inspect the tube material. Different polymers require different sealing windows. Excessive heat can wrinkle the tube or burn its inner layer. Insufficient heat produces a weak, cloudy seam. I have seen teams adjust settings without checking film compatibility first. That is an easy mistake. Good sealing depends on repeatable settings, clean surfaces, stable pressure, and honest testing.

Common Causes of Leaks in Tube Sealing Machines

Why Does My Tube Sealing Machine Leak?

Common Causes of Leaks in Tube Sealing Machines

A leaking tube seal often begins with uneven pressure, not a major machine failure. During routine checks, inspect the sealing jaws for residue, scratches, or misalignment. Product film, cream, or powder can collect along the contact surface. Even a thin layer may create a small passage for air or liquid. The seal looks fine. Small leaks matter.

Temperature is another common cause. If the jaws are too cool, the tube material may not bond completely. Excessive heat can weaken the tube or produce a brittle, wrinkled edge. Check the actual sealing temperature instead of trusting the displayed setting. Sensors can drift over time. That detail is easy to miss.

Incorrect pressure and short sealing time also cause failures. A loose pneumatic system may reduce jaw force, while excessive force can deform the tube opening. Check air lines, regulators, and pressure settings before changing several variables together. I have found that rushed adjustments often hide the original problem. One change at a time works better. Also examine the tube position. If it enters the jaws unevenly, one side may seal while the other side remains open. Test several sealed tubes after cleaning, adjustment, and cooling. A visual inspection helps, but a controlled leak test provides more reliable evidence.

How to Inspect the Tube, Seal, and Machine Components

Why Does My Tube Sealing Machine Leak?

A leaking tube does not always indicate a machine failure. Inspect the tube under bright, angled light. Look for pinholes, uneven walls, scratches, and an oval opening. A tube can appear normal but still collapse during sealing. Check whether the tube contains product near the sealing area. Even a thin oily film can prevent proper bonding. Wipe the outside carefully and examine the cut edge for burrs or cracks.

Inspect the seal itself. It should look even, centered, and fully fused across the tube width. Wrinkles, bubbles, cloudy edges, or a weak corner suggest incorrect heat, pressure, or dwell time. Compare several sealed tubes, not only one. I once blamed low temperature, but misaligned jaws caused the uneven seal. That assumption was wrong.

Turn off power and isolate air pressure before checking machine components. Examine the sealing jaws for product buildup, wear, or damaged surfaces. Confirm that both jaws meet evenly, without rocking or leaving a visible gap. Check heater connections, temperature sensors, pressure regulators, and pneumatic lines for loose fittings. A slow air leak can reduce sealing force during the cycle. Verify the tube holder and guide position as well. Small alignment errors matter.

Use a controlled leak test suited to the tube material. Record temperature, pressure, and dwell time for each trial. Do not change several settings at once. That makes the real cause harder to identify. In practice, rushed inspections often miss simple contamination.

Step-by-Step Methods for Fixing Tube Sealing Leaks

Why Does My Tube Sealing Machine Leak?

A leaking tube seal usually points to poor alignment, unstable heat, or contamination. Stop the machine and allow the sealing area to cool. Inspect the tube path, sealing jaws, and surrounding surfaces. Look for product residue, wrinkles, scratches, or uneven pressure marks. Even a small particle can create a visible channel.

Clean the sealing jaws with an approved, non-abrasive material. Do not scrape the surfaces. Check whether the tube sits centrally between the jaws. A crooked tube can seal on one side and leak on the other. Next, review the temperature, sealing pressure, and dwell time. Change one setting at a time, then test several empty tubes. Record each result. Random adjustments often hide the real cause. I have seen operators increase heat too quickly, which damaged the tube instead of improving the seal.

Tips: Use a simple leak test after every adjustment. Fill a sample tube with water, seal it, and gently squeeze it above a clean tray. Watch for droplets or slow seepage. Replace worn sealing pads, loose guides, or damaged sensors. If the leak remains, compare the seal width across multiple samples. Uneven results may indicate mechanical wear. Check this carefully. A machine can appear stable while producing unreliable seals. Keep a short maintenance log with dates, settings, and observed defects. It makes troubleshooting faster and supports consistent quality.

Why Does My Tube Sealing Machine Leak? - Step-by-Step Methods for Fixing Tube Sealing Leaks

Leak Symptom Likely Cause How to Check Corrective Action Priority Verification Method
Seal opens when the tube is squeezed Insufficient sealing temperature, pressure, or dwell time Inspect the seal for weak bonding and compare the actual settings with the approved process range Adjust one parameter at a time; allow the sealing jaws to reach a stable temperature before testing High Squeeze test followed by a leak or burst test
Intermittent leaks at different points along the seal Uneven jaw pressure, misalignment, or worn sealing surfaces Examine the seal width across its full length and check whether the jaws meet evenly Clean and align the jaws; inspect springs, pads, and sealing faces; replace damaged parts High Measure seal width and perform repeated leak tests
Wrinkles, channels, or gaps in the seal Product residue, moisture, dust, or trapped air in the sealing area Open a failed tube and inspect the internal and external sealing surfaces Keep the tube head clean and dry; prevent overfilling and remove contamination before sealing High Visual inspection under consistent lighting
Seal is burned, brittle, or discolored Excessive temperature, pressure, or dwell time Look for brown edges, melted material, brittleness, or deformation near the seal Reduce the heat or dwell time gradually and confirm the temperature sensor is accurate Critical Visual inspection and material-strength test
Leak occurs immediately after sealing Tube is not positioned correctly or the sealing area is outside the jaw centerline Check tube alignment, insertion depth, and whether the seal is centered on the tube Adjust guides and stops; position the tube consistently before each sealing cycle High Check seal location and repeatability across samples
Only certain tube materials leak Incorrect settings for the tube material, wall thickness, or multilayer structure Compare successful and failed materials, dimensions, and sealing requirements Create a validated parameter set for each material and confirm compatibility before production High Material-specific seal-strength testing
Seal width changes during a production run Temperature fluctuation, unstable air pressure, or inconsistent cycle timing Record actual temperature, air pressure, cycle time, and seal width at regular intervals Stabilize utilities, service the temperature controller, and inspect pneumatic components for leaks High Control-chart monitoring of seal quality
Tube leaks after cooling or storage Seal was tested while hot, or the material shrank and stressed during cooling Repeat testing after the seal has cooled to room temperature and inspect for stress cracks Allow adequate cooling time; reduce thermal stress and validate the seal after conditioning Medium Post-cooling leak and aging test
Leak is caused by a pinhole or tear near the seal Damaged tube wall, sharp tooling, excessive clamping force, or handling damage Inspect the tube body and jaw edges with magnification if necessary Remove sharp edges, reduce mechanical stress, and improve tube handling and storage Medium Visual inspection and pressure test
Repeated failures after cleaning or maintenance Incorrect reassembly, contaminated sealing pads, or changed jaw alignment Compare component positions with maintenance records and inspect pad seating Reassemble according to the machine procedure, clean compatible surfaces, and recalibrate alignment Medium First-piece approval after maintenance
Recommended troubleshooting sequence: Stop production if leakage affects product safety, isolate the failed samples, clean the sealing area, confirm tube alignment, check actual temperature and pressure, adjust one variable at a time, and verify the repair with cooled samples and documented leak testing.

Preventive Maintenance for Reliable Tube Sealing Performance

Why Does My Tube Sealing Machine Leak?

Preventive Maintenance for Reliable Tube Sealing Performance

A leaking tube often signals neglected preventive maintenance, not only incorrect sealing settings. In production, small residue on the sealing jaws can create uneven pressure. The result may appear as a tiny channel along the tube edge. I have seen operators increase temperature first, which sometimes makes the problem worse.

Clean the sealing jaws at the end of each shift. Remove plastic residue with an approved non-abrasive tool after the machine cools. Inspect the jaw surfaces for scratches, looseness, or uneven contact. Check temperature readings against an independent thermometer when seals become inconsistent. Sensors can drift. That detail is easy to miss.

Review air pressure, sealing time, and cooling time during scheduled maintenance. A worn pneumatic component may reduce jaw pressure without obvious noise. Confirm that the tube is centered before sealing. Misalignment can produce one thick edge and one weak edge. Replace damaged heating elements, worn cushions, and cracked air lines promptly. Do not wait for repeated leaks.

Tips: Keep a simple maintenance log. Record seal temperature, pressure, cleaning time, and rejected tubes. Inspect before problems become visible. One missed check can become a full production delay. Also, train operators to report unusual smells, vibration, or delayed jaw movement. Their observations often reveal faults earlier than routine measurements.

FAQS

How does a tube sealing machine create an airtight seal?

Heated jaws soften the tube’s inner layer. Pressure fuses both surfaces together. Cooling then locks the bond in place. That sequence matters.

Why might a sealed tube leak?

Residue on the tube edge can create a tiny leakage channel. Uneven jaw pressure may weaken one corner. Small defects matter.

Can higher temperature fix a weak seal?

Not always. Excessive heat can wrinkle the tube or damage its inner layer. Check material compatibility first. Temperature is only one factor.

What should operators clean before sealing?

Clean the tube edge and sealing jaws before every production run. Remove cooled plastic residue with a suitable non-abrasive tool. Clean surfaces improve consistency.

How can jaw alignment affect sealing quality?

Misaligned jaws may create one thick edge and one weak edge. Check alignment with a thin test strip. Look closely.

Which settings should operators record?

Record temperature, pressure, sealing time, and cooling time. Include rejected tubes and cleaning details in a simple log. Written records reveal patterns.

How should operators test sealed tubes?

Test several sealed tubes, not just one. Inspect the seam visually, then check strength after normal handling. A perfect appearance proves little.

What maintenance checks help prevent leaks?

Inspect jaw surfaces for scratches, looseness, and uneven contact. Check air lines, heating elements, cushions, and pneumatic parts. Do not wait for repeated leaks.

What warning signs should operators report?

Report unusual smells, vibration, delayed jaw movement, and inconsistent sealing. These signs may appear before visible leakage. Operators notice details.

Why should cooling time be checked?

Cooling allows the fused layers to stabilize. Insufficient cooling may leave a fragile seam during handling. I may underestimate this step sometimes. Cooling deserves attention.

Conclusion

If you are asking, “why does my tube sealing machine leak,” the problem usually comes from an incomplete or uneven seal. A tube sealing machine creates an airtight closure by applying controlled heat, pressure, and sealing time to the tube material. Leaks may occur when the temperature is too high or too low, the sealing pressure is inconsistent, the tube is contaminated, or the sealing jaws are worn, misaligned, or damaged. Incorrect tube placement and unsuitable sealing settings can also weaken the finished seal.

To identify the cause, inspect the tube surface, seal line, heating elements, pressure components, and alignment of the machine. Check for wrinkles, gaps, burn marks, residue, or uneven sealing. Corrective steps may include cleaning the sealing area, adjusting temperature and pressure, replacing damaged parts, and testing several tubes after each adjustment. Regular cleaning, calibration, component inspection, and timely replacement of worn parts can help maintain reliable, airtight sealing performance and reduce future leaks.

Sophia

Sophia

Sophia is a dedicated marketing professional with an exceptional depth of knowledge about her company's products and services. With a keen understanding of market trends and customer needs, she crafts insightful blog posts that not only inform but also engage readers, enriching the company’s online......