A liquid filling machine can look clean while product residue remains inside a nozzle, gasket, or valve seat. That hidden soil can affect product quality and make the next cleaning cycle less effective. The stakes are real: the World Health Organization’s 2015 foodborne disease estimates attribute about 600 million illnesses and 420,000 deaths worldwide to contaminated food each year. Those figures cover many causes, not filling machines alone, but they underline why hygienic handling deserves attention.
This guide explains how to clean a liquid filling machine through practical steps grounded in equipment-maker instructions and established hygienic-design guidance. It covers preparation, safe disassembly, detergent selection, rinsing, inspection, drying, and records. Pay close attention to product-contact surfaces, narrow passages, and seals where residue can collect. Small details matter.
There is no single cleaning schedule or chemical that suits every filler. Product type, machine design, and operating conditions all influence the procedure. Follow the manufacturer’s manual and your site’s approved sanitation process; do not assume a visual check proves cleanliness. A clean-looking nozzle may still hold residue. The ten tips ahead offer a clear starting point, while noting where operators must verify the details for their own line. Cleaning is repetitive work, and even experienced teams can miss a step. That is worth admitting—and correcting.
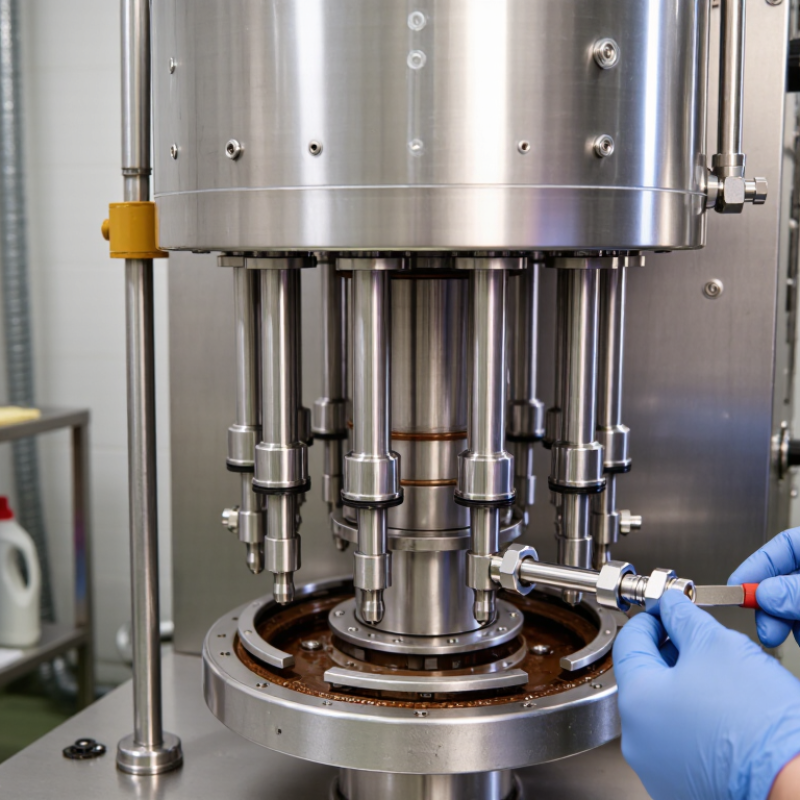
Before cleaning, map the product path from the hopper to each filling nozzle. Identify removable parts, seals, dead ends, and surfaces hidden behind guards. A pump may need a different cleaning method from a gravity-fed line. Check the equipment manual for approved detergents, temperatures, disassembly steps, and whether the system supports clean-in-place. Never assume that a rinse reaches every valve seat. Small details matter.
The CDC estimates that foodborne illness causes 48 million illnesses in the United States each year. That figure is not specific to filling machines, but it shows why cleaning design deserves close attention. FDA regulations require food-contact surfaces to be cleaned as often as necessary to prevent contamination (21 CFR 117.35). Use the machine’s hygienic design guidance, such as EHEDG’s principles for cleanable equipment, alongside site procedures. Inspect gaskets for trapped residue and look inside nozzle tips under good lighting. Record cleaning steps and verification results, using suitable swabs or other validated checks. The awkward part is that a machine can look clean while a narrow connection still holds product. Review the cleaning method after product changes, maintenance, or repeated test failures; the original procedure may no longer fit the line.
Trace the product path from the hopper to each nozzle. Check removable parts, seals, hidden surfaces, and narrow connections. Small details matter.
Not always. A rinse may miss residue behind a valve seat or inside a narrow fitting. Follow the machine instructions and inspect hard-to-see areas.
Remove only the parts specified in the instructions. Wash the hopper, nozzles, valve seats, and seals with approved detergent and tools. Rinse away detergent, then apply food-contact sanitizer for its specified concentration and contact time.
Not necessarily. Residue can hide beneath a gasket or inside a nozzle tip. Use suitable verification checks, such as validated swabs, as well as visual inspection.
Record sanitizer concentration, temperature, contact time, and inspection results. Test strips can reveal dilution errors. Paperwork is easy to initial without thinking, so review failed readings closely.
Make sure parts are dry and free of lint. Seat seals flat, secure connectors, and follow the parts diagram. A small seal is easy to miss.
Confirm guards are in place and settings match the approved procedure. If suitable, run a short test and watch for drips, uneven flow, or unusual vibration.
Check several cycles, not just one. Measure fill volume with a calibrated scale or vessel and compare it with the machine’s specified tolerance. Stop if results vary or a leak appears. A quiet first run proves little.
Cleaning a liquid filling machine effectively begins with understanding its design, cleaning requirements, and the parts that come into contact with the product. Before starting, prepare the necessary cleaning supplies and protective equipment, then isolate the machine from its power source according to its operating instructions. This helps create a safe, organized process and reduces the chance of accidental startup.
Next, drain any remaining product and carefully remove components designed to be taken apart. Clean and sanitize product-contact surfaces using suitable methods, paying attention to fittings, seals, and areas where residue may collect. Allow parts to dry as required, then reassemble them correctly and check that connections are secure. Finish by verifying the machine’s operation before returning it to normal use. Following these steps provides a practical guide on how to clean a liquid filling machine while supporting consistent hygiene and reliable performance.

 Collins Machine